

Prototyping
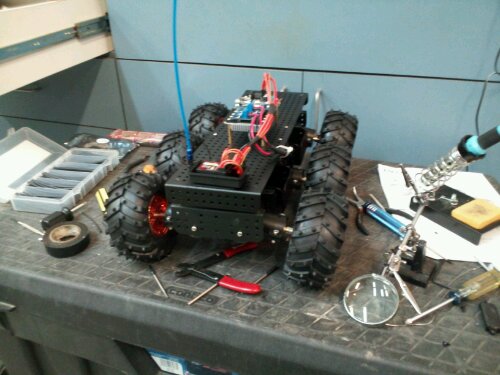
Raw new platform. Something crazy will come of this. For now, a few parts are missing to even get it to RC control level. The box of extraneous sensors isn’t even open yet.
Brewing Table — More Plumbing Required
The table build came together nicely today. Right up until I determined I need just a couple more plumbing parts. Of course, the missing bits are stainless quick couplers that I am unlikely to find without driving all over creation. Rather than waste the time, I just ordered them.

Nearly Complete
I finished up the minor electrical bits to add a switch to the pump. I was being brilliant and used an exterior box. As I was finishing the wiring, I noticed the motor for the pump isn’t sealed. Makes the sealed box somewhat pointless. Although, I believe I’ll add a splash shield above the pump at some point. I will splash, spill, or somehow send fluid onto the pump at some point.
In addition to the electrical, I installed the thermometers into the pump along with the false bottom for the mash tank. The plate chiller as mounted below the boil kettle as well. I’d completely missed the chiller in my back of the napkin plumbing diagram. That explained the missing plumbing parts.
I also need some quick couplers for the garden hose attachments for the plate chiller. Those I’ll pick up during another run to the hardware store. Cost is still below my original estimate for the build. A non-trivial outlay of cash but very close to what I expected.
I also ordered 3 flame shields for the front of the kettles. The thermometers need to be protected but the plates sent from Blichmann were a tad too narrow. Another $20 but the new ones can be permanently mounted. Loose bits get lost.
The picture also shows I really need to clean the office garage soon.
Brewing Table – Burner Update
More progress on the 3 position brewing table. I finally got back to working on the table yesterday afternoon. The dreaded work beast has been cutting into my free time in a large way.
I received the kettles about a week ago. First thing I determined is that I’d failed to account for the stepped edges. I knew about them but just failed to remember the fact during the assembly. After a tad more grinding and follow-up welding, the issue is resolved.
Rather than watching paint dry after the fix, I moved onto finishing up the plumbing for the gas distribution system. The burners are all propane and fed by 1/2 inch NPT black pipe. Input is a 3/8″ flare to 3/8″ NPT attached to a 3/8″ to 1/2″ reducing coupler. From there it feeds out to all 3 needle valves. I used flex tubing from the valves to the burners via 1/2″ OD appliance hookups. Attachment at the burners used 1/2″ flare to 3/8″ flare reductions and 3/8″ elbows to attach to the orifices.
Sounds simple in retrospect. I spent a lot of time trying to figure out how to make it all work. Aside from the flare elbows and the needle valves, I found everything at the local hardware stores. Lowes beat out Home Depot for having a better selection of flare fittings.
Brewing Table in Progress
2012 is the year to begin brewing with all grain ingredients instead of extract. The first thing I needed was a three burner table. Fab began on December 20th. The main structure is completed. Plumbing for gas and liquid is up next.

Crafting a Leather Bottle – Part 3
In part 1, I discussed prototype assembly. Part 2 focused on sealing the bottle. The only thing remaining was fashioning a stopper. Directly after posting part 2, I had a new idea.
I was going to fashion a stopper from a piece of wood. A wooden stopper requires only some whittling and sanding. However, I did not have a good chunk of non-porous wood on hand. So I turned to an alternate material – horn. Unlike most, I have several different racks from deer lying about.
I removed one point from a rack using a jig saw. Then I cleaned up the end using a rasp and some sandpaper. Finally, I drilled a small hole through the stopper for a leather strap. If I’d added a carry strap to the bottle, I’d have attached the stopper through one of the holes. No sense in losing a stopper when it can be attached to the bottle.
After honing down the antler segment, I sealed it with salad bowl finish. A nice, food safe sealant for wood available at wood working stores. Finally, I braided a small strap to provide grip when removing the stopper. I like the look.

All Stopped Up

Stopper and Strap

Stopper and Strap - Over the Spout
Crafting a Leather Bottle – Part 2
Sealing my leather bottle rose up the to-do list today. The process is straightforward and is easy enough to accomplish. Back in part one, I discussed the overall construction and stretching process. The prototype has had over a week to completely dry.
Once dry, I emptied the pearl barley used for stretching the leather into a bottle like shape. After nearly an hour of gentle tapping and hand thumping, I dumped a dozen copper BB’s into the bottle to knock the final few grains loose. The BB’s were an afterthought but they did knock out dozens more grains that were stuck along the seams.
My wax tank is a cheap stock pot. I bought it specifically for the purpose so I did not have to clean the pot after the fact. The pot will serve additional projects as well as being a storage container for the wax.

Beeswax Pot
As the wax was melting down, I put the bottle prototype in an aluminium roasting pan. The pan and bottle went into the oven on ‘Warm’. Warming the leather at the lowest temperature possible allows it absorb the wax more readily.
The pan serves as a catchment for extra wax eliminating any clean up. They can be bought for around a $1. I also picked up a set of terry cloth hand towels for a couple of dollars. The towels are needed when you want to clean off excess wax. The wax is nearly impossible to clean from the towels so don’t use anything nice.
The original plan was use a paintbrush to apply the wax. However, the prototype was small enough to completely immerse in the melted wax. Immersion is faster and more effective than repeatedly coating exterior surface. Hot wax will shrink leather as well as making it rigid. (Some sources identify it as being used in armor construction. However, my personal belief is that most hardened leather was likely produced using boiling in water.) Be wary of leaving the leather in the hot
wax too long.
I chose to do 3 different immersions. The first was for 30 seconds. The second and third were immersed for 15 seconds each. In between each step, I allowed the bottle to cool until it was warm to the touch. The bottle was stoppered with a dowel during all the immersions.

Bottle after 1st Immersion
Although the wax adds rigidity, warm, waxed leather can deform so take care not to apply unintended pressure near the center of the bottle. My prototype slipped at one point and now has a depression along the the right, front side.
After thoroughly coating the exterior, the bottle was again allowed to cool down to a warm temperature. While it was cooling, I formed a spout in a metal vegetable can. Then, I filled the can from the main wax source and carefully poured wax into the bottle. The wax was then swirled along the internal edges before the excess was poured out. I repeated the process three times once again. It appeared the leather was completely saturated with wax but the extra coats on the interior provide additional protection.
The final bottle still lacks a cool stopper. I also did not punch holes for a carrying strap as planned. Since its a prototype, I didn’t feel like it was needed.

Finished Front

Finished Back
Although the back looks much lighter than the front, that is partially due to the lack of dye. Additionally, the bottle was still warm and darkened significantly once cool. Applying dye for color is a waste when waxing. The two sides are only slightly different shades once completely cool.

Finished - Side View
Now I just need to craft a stopper and the prototype will be complete.
Crafting a Leather Bottle – A Prototype
A few days ago I began constructing a leather bottle. I decided to start with a small size to avoid having to discard a large volume of the leather if things go awry. The process is straightforward.
- Cut a pattern for the bottle, flask, or canteen. I chose to use 5-6 ounce leather since I had it on hand. Others choose to use lighter (3-4 ounce) or heavier leather (10-12 ounce). Lighter leather will stretch more easily and easier to sew. It may not be as durable in the long term.
- Stitch the leather together. Most examples I have seen use a double row of stitching. The leather will be under some significant pressure when you expand the bottle. Twin rows should help keep the bottle sealed once it has been finished.
- Stretch the leather. Historically, it appears this process used sand to pack the bottle and stretch it. An alternative approach is to form the leather before sewing the two halves together. I decided to go with the packing method. Instead of sand, I chose t use pearl barley, which was mentioned as an alternative to sand. I could go buy clean sand but buying 80 pounds of play sand for a couple of bottles would be excessive.
- Let the bottle dry. Repeat the stretching process.
- Build a stopper for the jug. Most are fashioned from a dense wood that won’t naturally absorb the liquid inside the jug. You can fashion the stopper at any point. You will need some way of sealing the opening after packing and for the sealing process.
- Seal the leather. The common approach is to use beeswax or a combination of beeswax and brewers pitch (pine resin). Often the exterior is sealed with beeswax alone. The interior can use either the mix or just beeswax. I’m going to go for a combination when I get to the sealing process.

Sewn Prototype, Barley, Funnel & Stuffing Stick
My prototype is approximately 6 inches in diameter with the top expanding into two squared of regions. Those regions will be punched with a hole or a slot to accommodate a carry strap. The spout is approximately 1.5 inches at the widest point. After sewing, over half an inch is lost, which made the spout very narrow. It really should be wider to allow easier packing not to mention filling and drinking. Mistake #1. The sew lines were approximately 1/4″ from the edge for the outer seam and 1/2″ from the inner. The outer seam should have been inset further. The front and back will not be the same size. Due to shifting, the outer seam was very close to the edge of the back for about an inch. Mistake #2. If I were more exact with the patterns, it would not have been an issue but just for safety, double check the overlap front to back to verify sufficient spacing.
After sewing, you can begin to construct the stopper. First determine how large the opening is. You can use math or just use a dowel to open up the leather until you have a general idea of how large it should be. I haven’t constructed mine yet. For now, I just trimmed down a larger dowel to secure the opening during the stretching process.
Once the stitching is complete, you are ready to stretch the leather to form a flask or bottle. Soak the leather until it is saturated. Some individuals mention several hours of soaking. I let mine soak in luke warm water for about an hour. If the leather is thick, you may need to allow more time. Use your stuffing dowel to work the neck of the jug open to its fullest dimension. Use the funnel to add sand or barley. Tamp the material down to the bottom. Repeat until the packing material has reached the bottom of your stopper in the neck. Do not be afraid to apply pressure. Pressure is what forces the leather to stretch into shape. I occasionally used a smaller rod to work material down the neck. It also allows you to angle the rod to hit various areas of the bottom seam.
Once its stretched. Stopper the jug and allow it to dry thoroughly. You may have to repeat the process several times to achieve the desired level of stretching. A few BB’s can be used to aid in knocking stubborn stuffing material loose from tight areas.

After the first packing

Top View, Close up
The initial stretch went better than I expected. I may do only one but I’ll see how it looks when it is fully dry. I didn’t like the distressed aspect on the front originally. It’s growing on me. Too bad I didn’t apply the same technique to the back panel. I’m going to find a nice chunk of aspen for my stopper. Probably not the best choice of wood but it will work for the prototype and I am in the middle of a National Forest.
| M | T | W | T | F | S | S |
|---|---|---|---|---|---|---|
| 1 | 2 | 3 | 4 | 5 | ||
| 6 | 7 | 8 | 9 | 10 | 11 | 12 |
| 13 | 14 | 15 | 16 | 17 | 18 | 19 |
| 20 | 21 | 22 | 23 | 24 | 25 | 26 |
| 27 | 28 | 29 | 30 | 31 | ||
Popular Resources
Categories
- Brewing (11)
- Code (111)
- Convergence (26)
- Game Design (4)
- Hovel (1)
- Labyrinth Lord (71)
- Maintenance (9)
- Merakai (15)
- Musings (199)
- Old School (100)
- Random Generator (17)
- RPG (404)