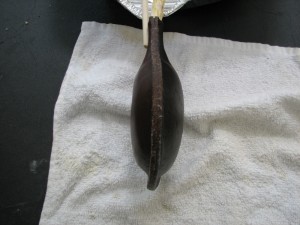
Crafting a Leather Bottle – Part 2
Sealing my leather bottle rose up the to-do list today. The process is straightforward and is easy enough to accomplish. Back in part one, I discussed the overall construction and stretching process. The prototype has had over a week to completely dry.
Once dry, I emptied the pearl barley used for stretching the leather into a bottle like shape. After nearly an hour of gentle tapping and hand thumping, I dumped a dozen copper BB’s into the bottle to knock the final few grains loose. The BB’s were an afterthought but they did knock out dozens more grains that were stuck along the seams.
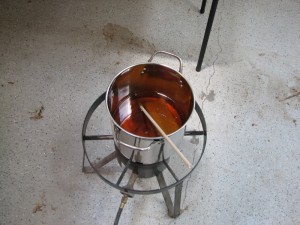
My wax tank is a cheap stock pot. I bought it specifically for the purpose so I did not have to clean the pot after the fact. The pot will serve additional projects as well as being a storage container for the wax.
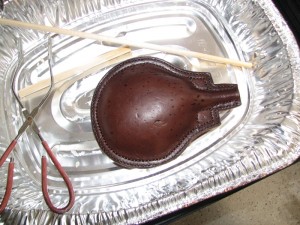
As the wax was melting down, I put the bottle prototype in an aluminium roasting pan. The pan and bottle went into the oven on ‘Warm’. Warming the leather at the lowest temperature possible allows it absorb the wax more readily.
The pan serves as a catchment for extra wax eliminating any clean up. They can be bought for around a $1. I also picked up a set of terry cloth hand towels for a couple of dollars. The towels are needed when you want to clean off excess wax. The wax is nearly impossible to clean from the towels so don’t use anything nice.
The original plan was use a paintbrush to apply the wax. However, the prototype was small enough to completely immerse in the melted wax. Immersion is faster and more effective than repeatedly coating exterior surface. Hot wax will shrink leather as well as making it rigid. (Some sources identify it as being used in armor construction. However, my personal belief is that most hardened leather was likely produced using boiling in water.) Be wary of leaving the leather in the hot
wax too long.
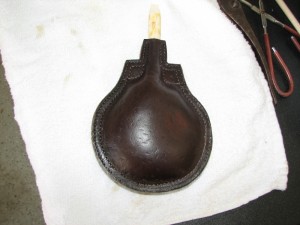
I chose to do 3 different immersions. The first was for 30 seconds. The second and third were immersed for 15 seconds each. In between each step, I allowed the bottle to cool until it was warm to the touch. The bottle was stoppered with a dowel during all the immersions.
Although the wax adds rigidity, warm, waxed leather can deform so take care not to apply unintended pressure near the center of the bottle. My prototype slipped at one point and now has a depression along the the right, front side.
After thoroughly coating the exterior, the bottle was again allowed to cool down to a warm temperature. While it was cooling, I formed a spout in a metal vegetable can. Then, I filled the can from the main wax source and carefully poured wax into the bottle. The wax was then swirled along the internal edges before the excess was poured out. I repeated the process three times once again. It appeared the leather was completely saturated with wax but the extra coats on the interior provide additional protection.
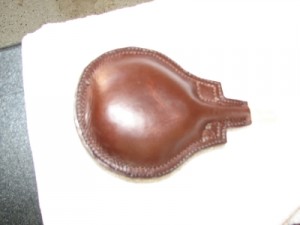
The final bottle still lacks a cool stopper. I also did not punch holes for a carrying strap as planned. Since its a prototype, I didn’t feel like it was needed.
Although the back looks much lighter than the front, that is partially due to the lack of dye. Additionally, the bottle was still warm and darkened significantly once cool. Applying dye for color is a waste when waxing. The two sides are only slightly different shades once completely cool.
Now I just need to craft a stopper and the prototype will be complete.
Tags: DIY, Leather| M | T | W | T | F | S | S |
|---|---|---|---|---|---|---|
| 1 | 2 | 3 | 4 | 5 | ||
| 6 | 7 | 8 | 9 | 10 | 11 | 12 |
| 13 | 14 | 15 | 16 | 17 | 18 | 19 |
| 20 | 21 | 22 | 23 | 24 | 25 | 26 |
| 27 | 28 | 29 | 30 | 31 | ||
Popular Resources
Categories
- Brewing (11)
- Code (111)
- Convergence (26)
- Game Design (4)
- Hovel (1)
- Labyrinth Lord (71)
- Maintenance (9)
- Merakai (15)
- Musings (199)
- Old School (100)
- Random Generator (17)
- RPG (404)


