

Buckboard Bacon Experiment #1
Two weeks past, I decided to make some bacon. Something a bit more meaty and tasty than what you can buy in the store. After failing to find inexpensive pork belly locally, I stumbled on buckboard bacon, which is basically cured meat from alternate cuts.
I browsed a multitude of cure options and one that kept being mentioned was Hi Mountain Buckboard Bacon Cure. The majority of people who suggested it had great pictures of the end result. Without further ado, I ordered a package of cure and approximately 28 pounds of pork butts (shoulders).
Step #1 of the process is to debone the shoulders and remove excess fat. Removing the bones is straight forward with a decent boning knife. Go slow and just slowly trim around the bones. At the end, I had large slabs of meat along with a variety of smaller bits and the bones with some meat left on them. The latter ended up in green chili.
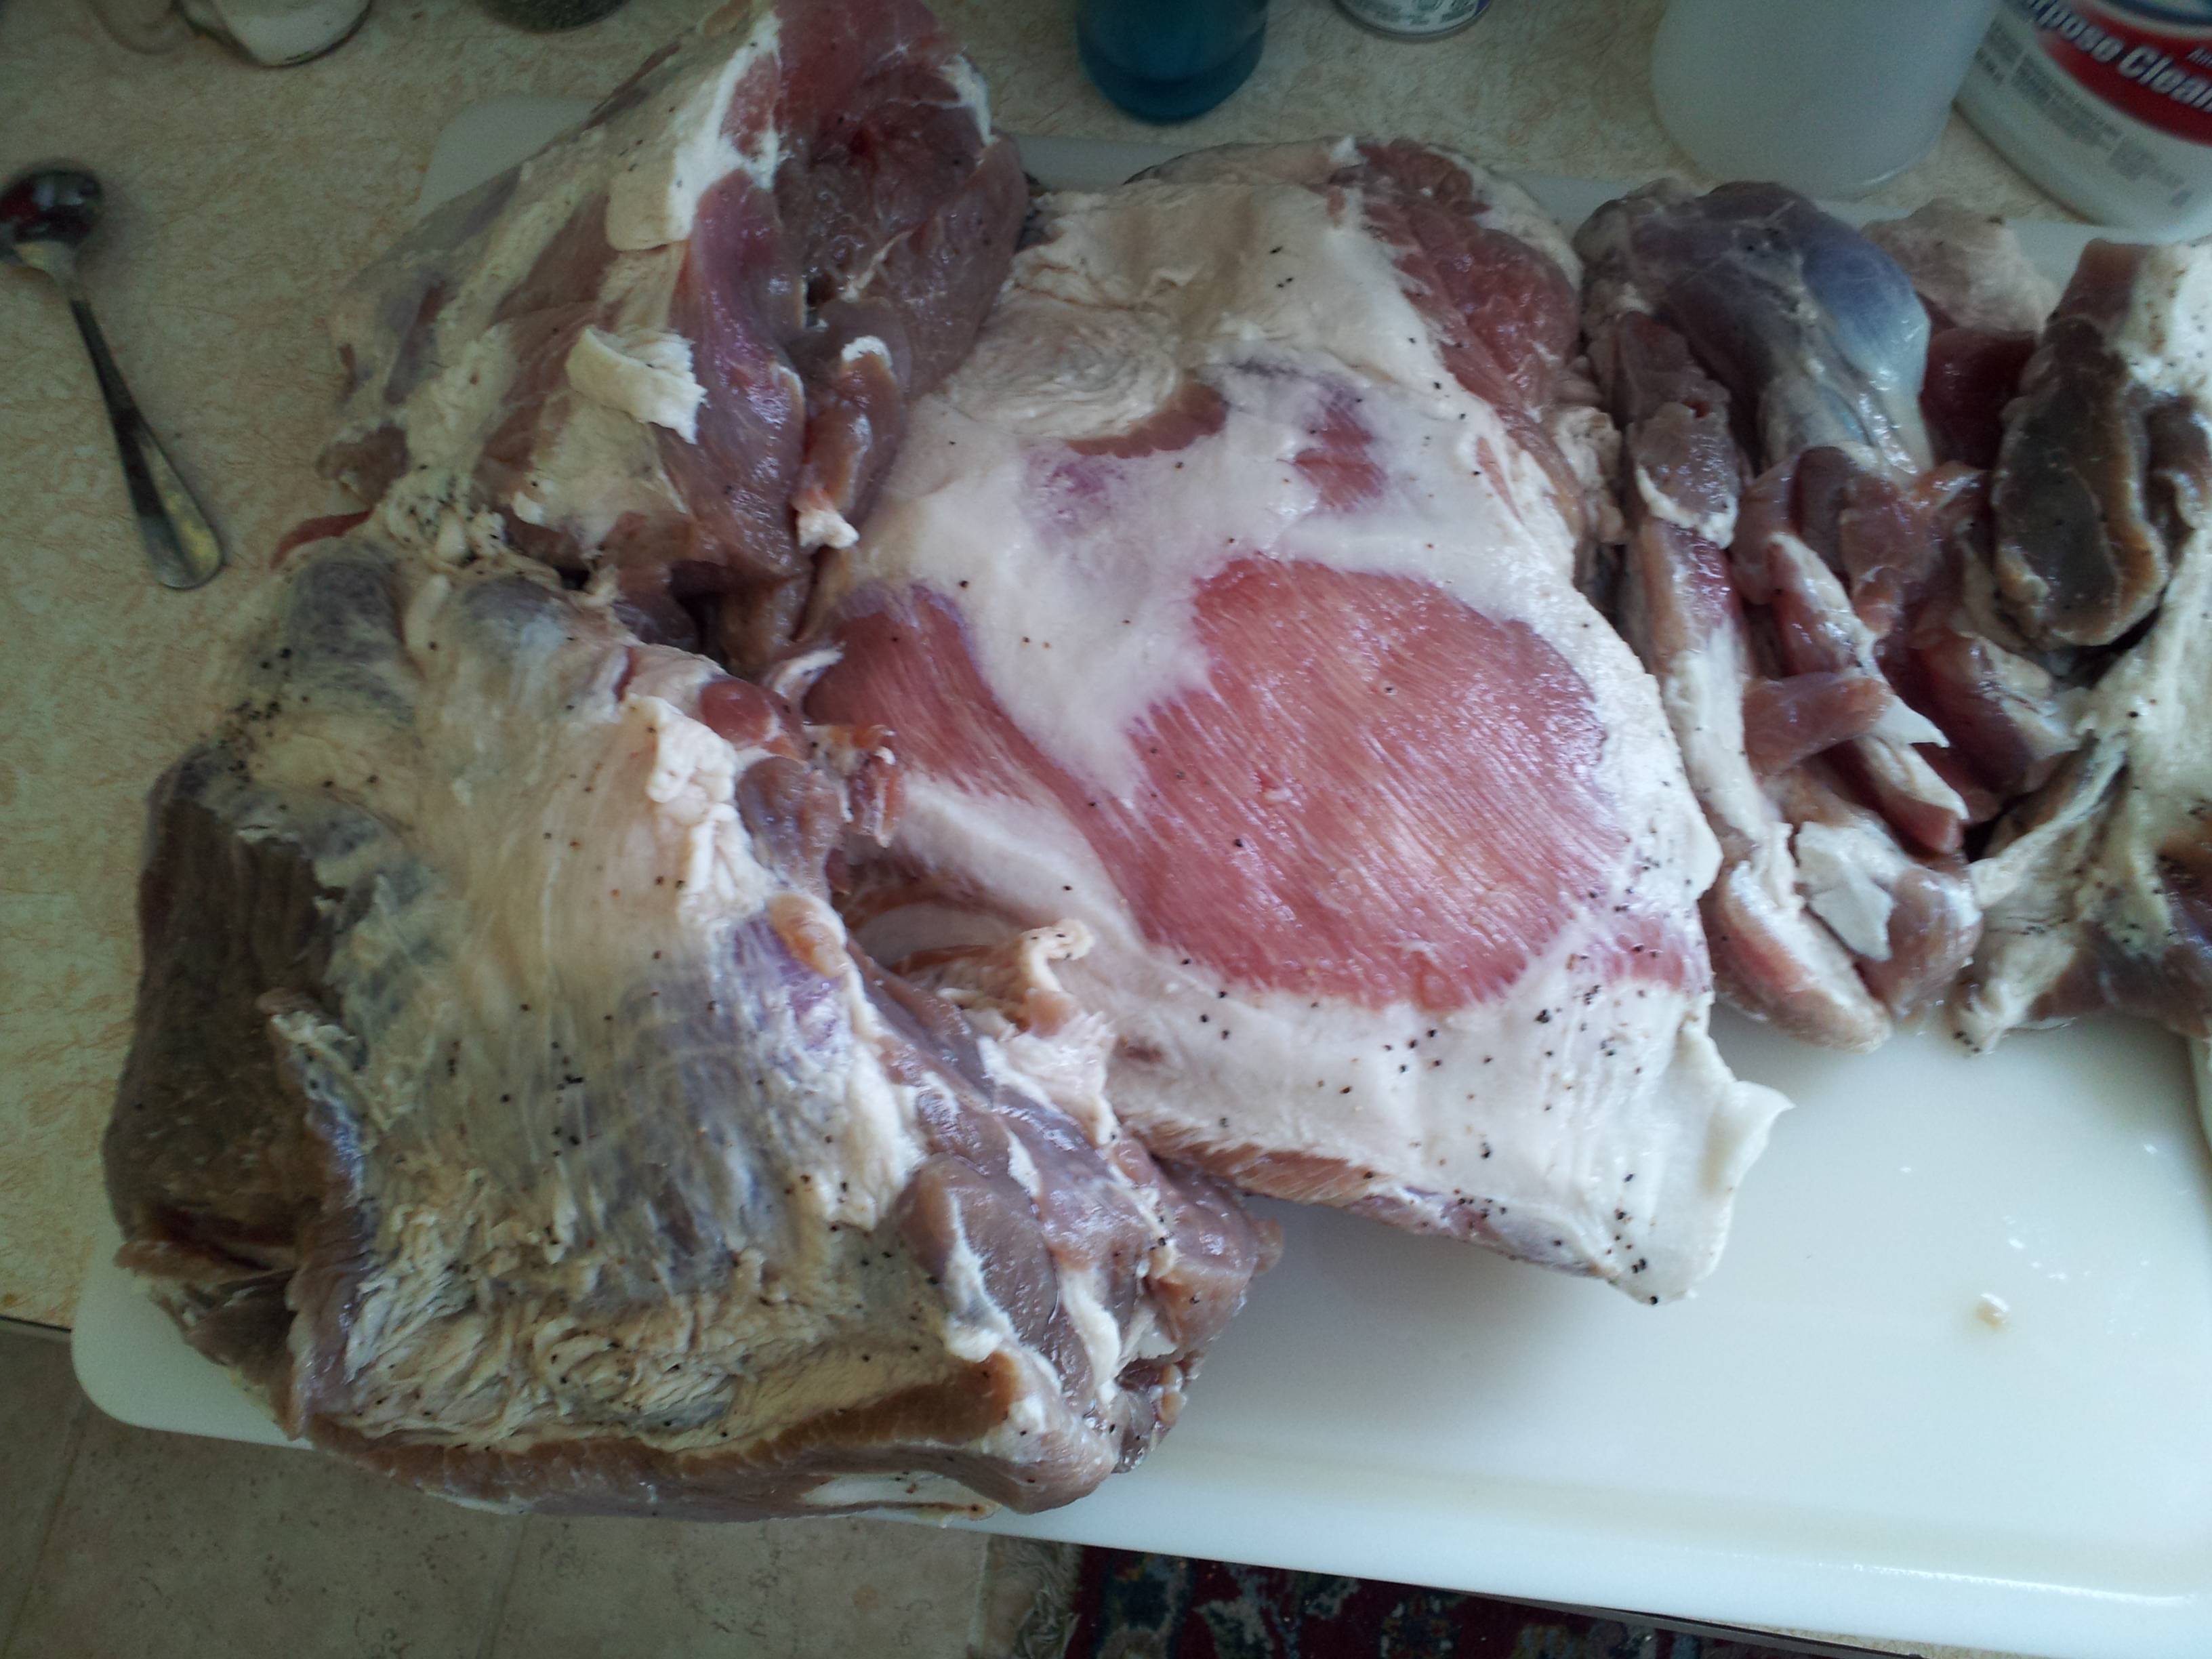
I should have divided the larger slabs into slabs about 2 – 2.5″ inches across. It would have allowed the cure to absorb easier and kept sizes consistent.
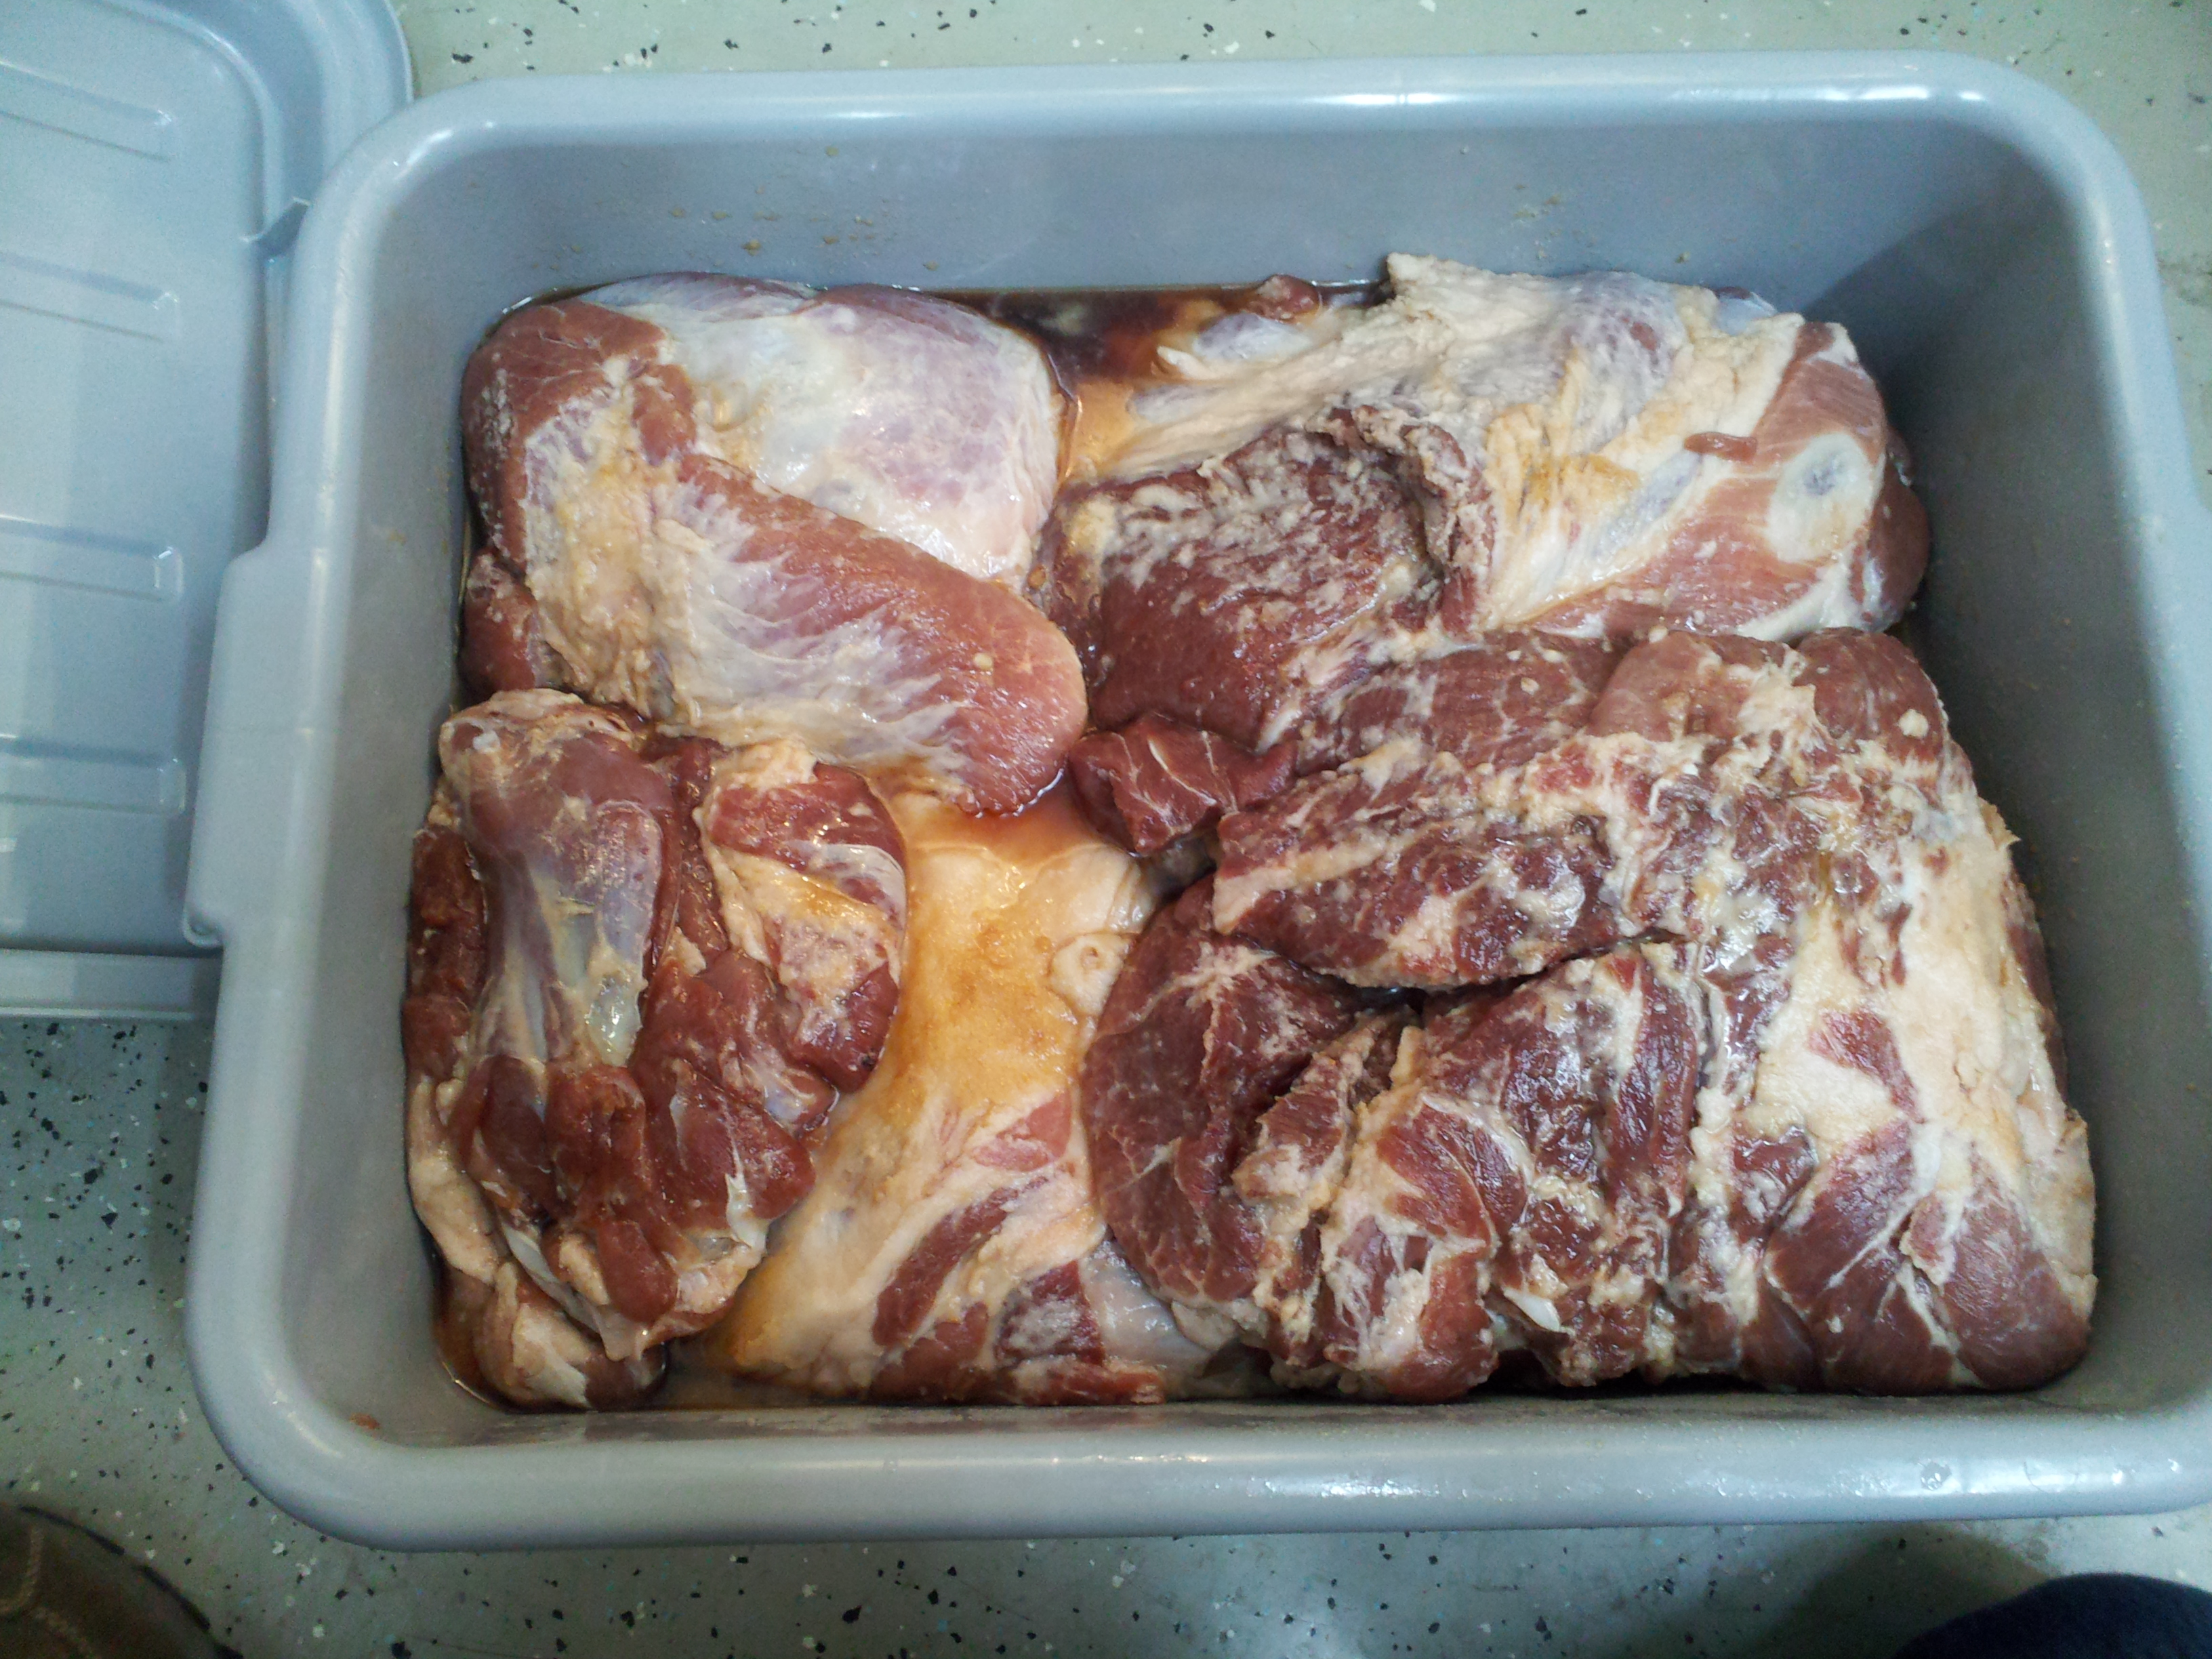
Step #2 was application of the cure. Just follow the instructions for your cure. The application is not difficult. Sprinkle some of the cure on the meat and massage into the surface. Make to apply cure to all portions of the meat including the pockets where the bones were removed. After the cure is applied, the meat goes into the a refrigerator for 7-14 days. The curing time depends on the thickness of the meat and the specific cure used. I turned my meat about every other day and kept it curing for about 9 days.
Packaging for the refrigeration can be ziploc bags, vacuum sealed bags, or a plastic tub. I had a handy meat tub to use which seemed far easier than individual bags.
Step #3 is waiting along with some meat turning and occasional curious eyeballing. Mostly waiting.

After 6 days, the color of the meat is darker and feels much firmer. At this point, I chose to heavily pepper two portions for peppered bacon. Honestly, the smell of the process was making salivate with more waiting on the horizon.
Step #4 is the soak out and fry test. Rinse all the meat thoroughly using cold water and soak for an hour. Cut a few portions off and fry to check salt taste. Repeat the soaking and testing until the saltiness reaches the desired level. I used two rinses and two hours of soaking. Keep in mind that as the bacon is smoked, the salt flavor remaining will concentrate due to the removal of water. I used one of the smaller slabs for fry test.

The flavor of the fry test was somewhere between bacon and ham. Tasty but definitely not what I expected for the final product.
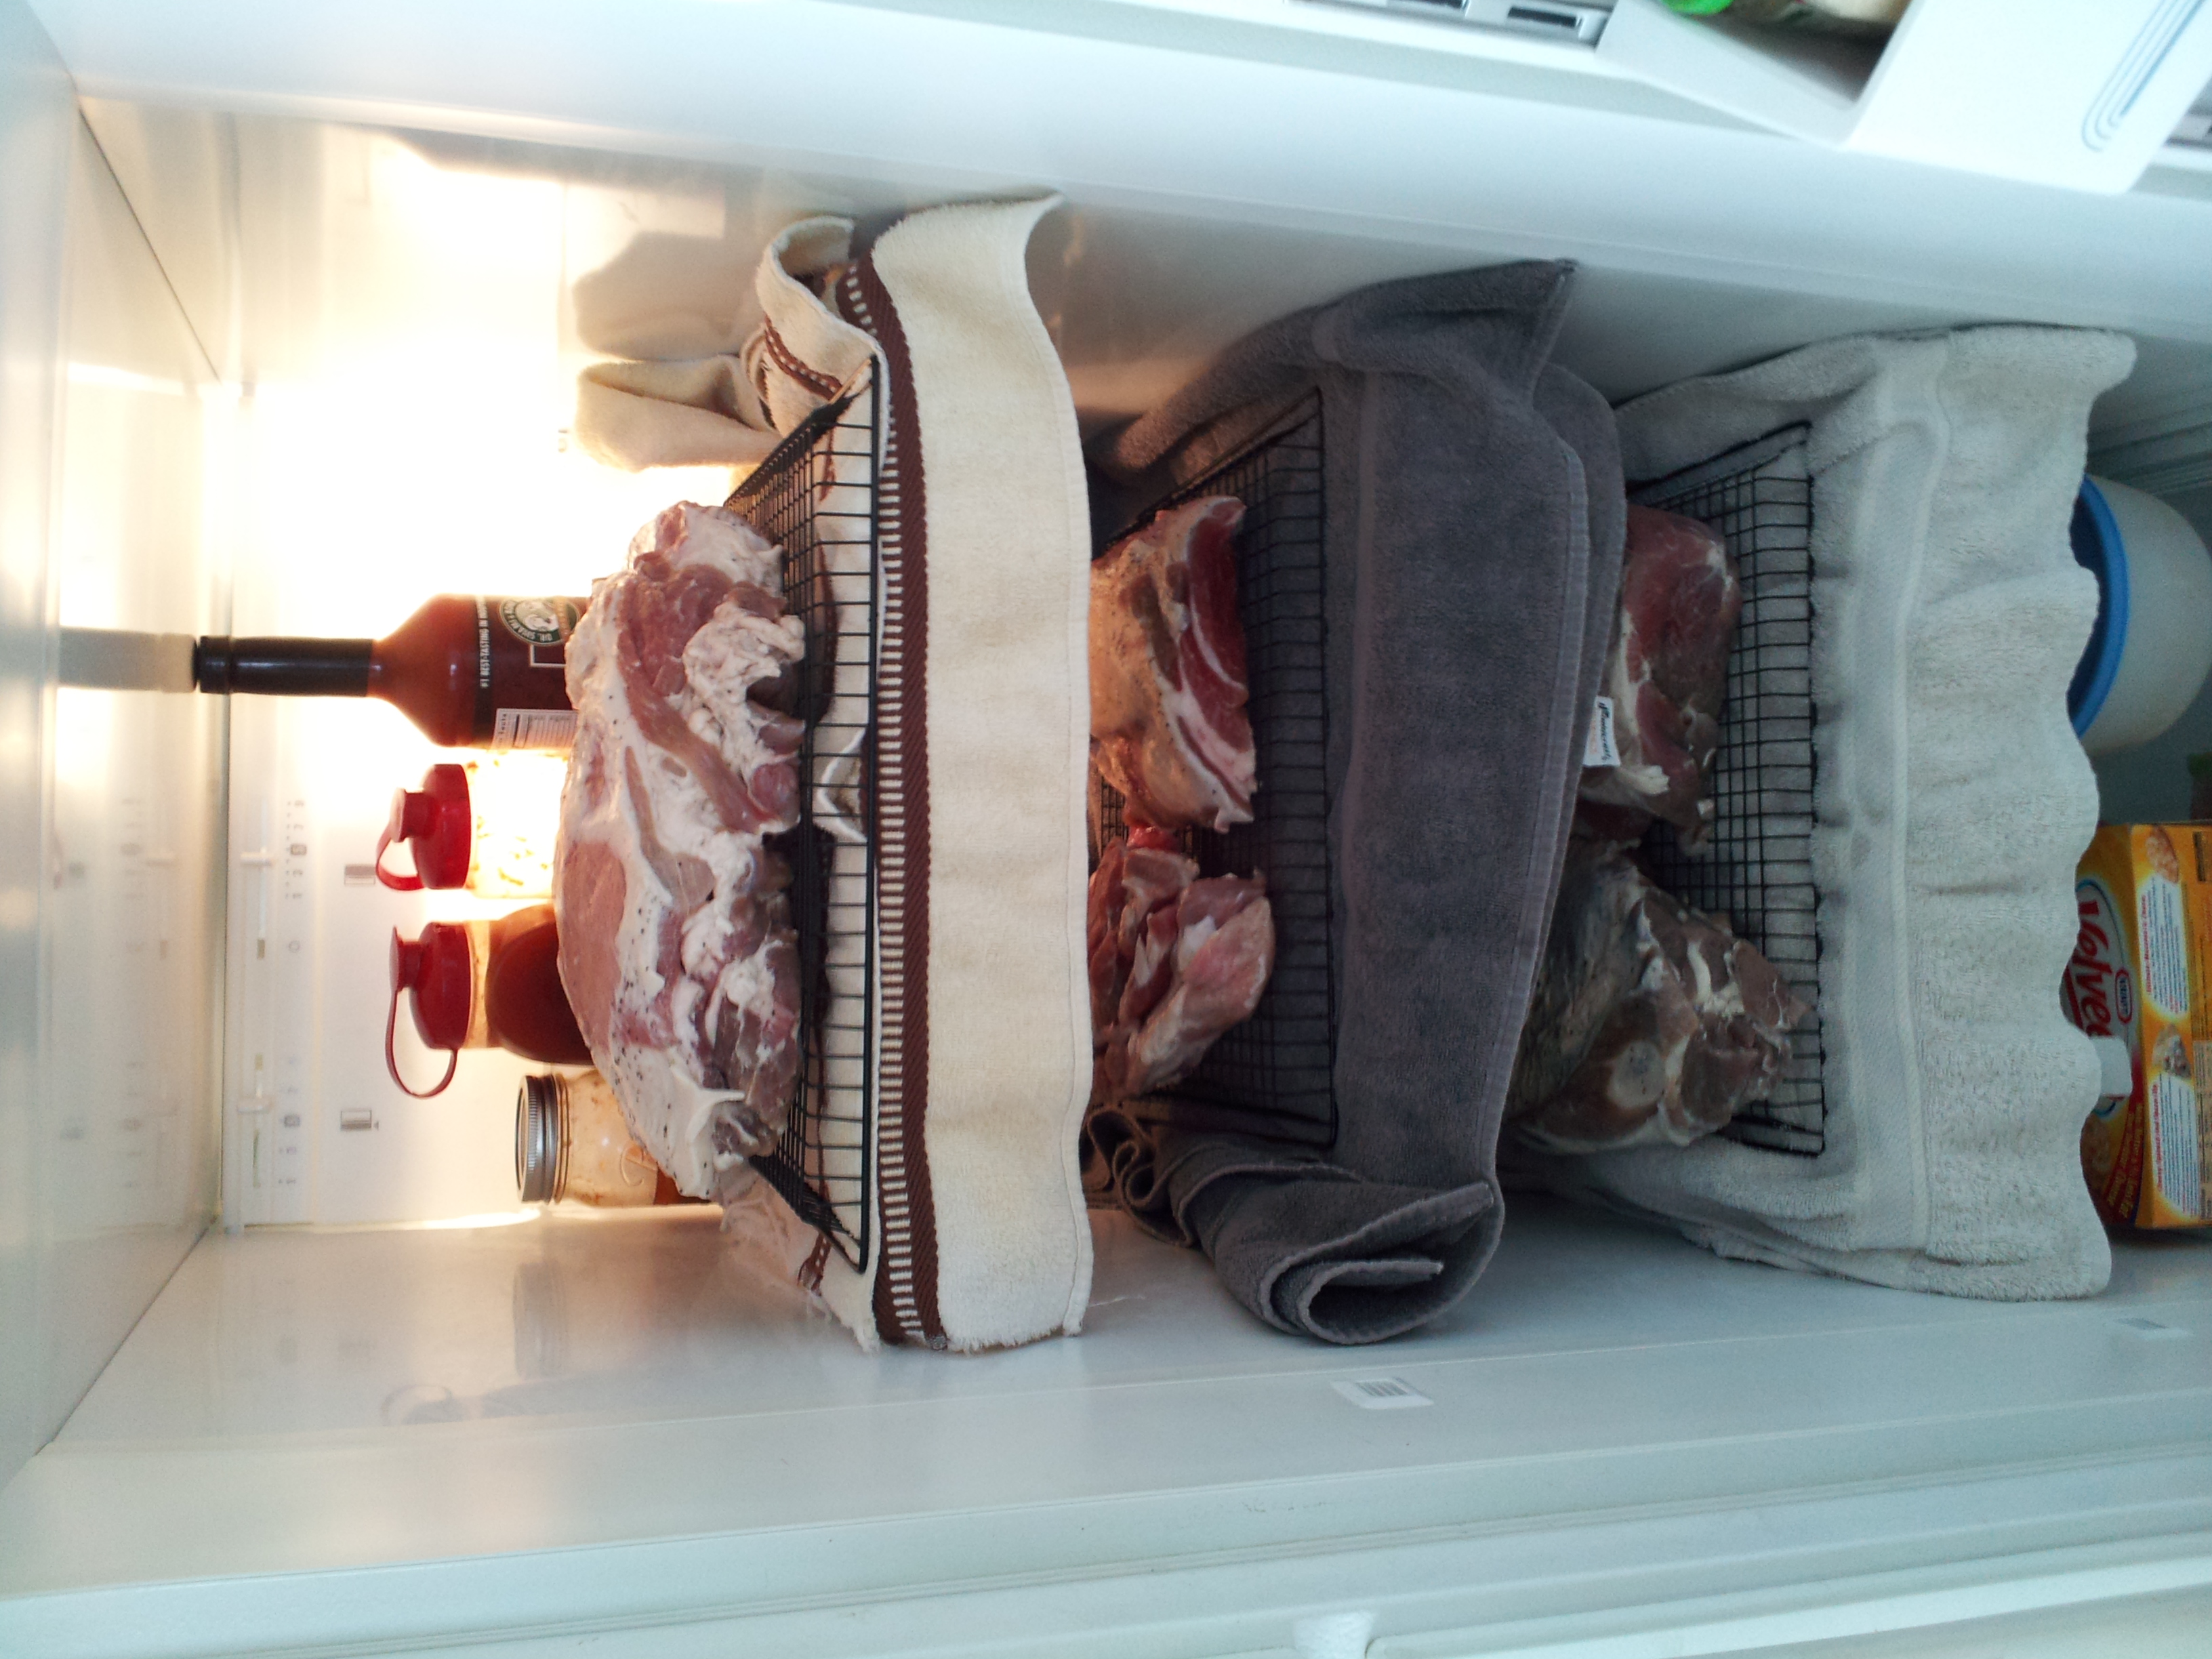
Step 5 is an overnight rest to form the pellicle. Pellicle was a foreign concept to me. Essentially the overnight rest allows the outer portion of the meat to form a tacky layer that aids in the uptake of smoke. To prepare for the rest, I patted the meat dry, tossed on a mixture of onion powder, garlic powder, and cracked black pepper. Additionally, for the one peppered bacon target, a re-applied a hefty layer of black pepper. Sadly, I forgot to keep the second separated during the rinsing process.
Pellicle formation requires air to all surfaces of the meat. I placed towels on my refrigerator shelves and then placed upside down jerky racks on the the towels. The meat then went in so I could begin yet another waiting period. Others suggest a fan blowing over the meat for an hour prior to smoking.
Step 6 is bringing on the smoke. Finally, down to the last waiting period. Smoking can take many forms, flavors, and practices. Most traditional bacon is cold smoked somewhere between 70 and 90 degrees Fahrenheit, which can take anywhere from a day to a week. I did not have the gear to cold smoke even though the outside temperature was a balmy 8 degrees when I awoke to start the process.
I used both an offset charcoal smoker and barrel electric smoker in the process. I was aiming to keep the electric at lower temperatures for a longer period of time because the offset is not easy to keep below 200 degrees.
I placed the thicker two slabs on the offset at 150 degrees and the three thinner slabs on the electric at 100 degrees without applying smoke for one hour. At the one hour mark, I added cherry and apple chunks to the electric and crab apple / apple splits to the offset.
The offset temperature was increased to 200 degrees after applying smoke. I kept the electric at 100-120 for 4 hours, then increased the temperature to 200 as well.
My goal was to remove heat when the meat reached 140 degrees — the point at which pork is edible without additional cooking. Doing so cooks the fat as well as the meat so the final product would lack some of the traditional marbling look. Once the meat hit 140 degrees, I cut the heat to the smokers and allowed the meat to rest on the smoker for another hour. The bacon was then moved into the house to rest further and slowly cool for a couple of hours. I used the same upside down jerky racks atop towels on the counter before moving it into bags into a freezer to cool further.
I failed to take any pictures in the middle of the process. Just picture wafts of sweet smelling smoke.
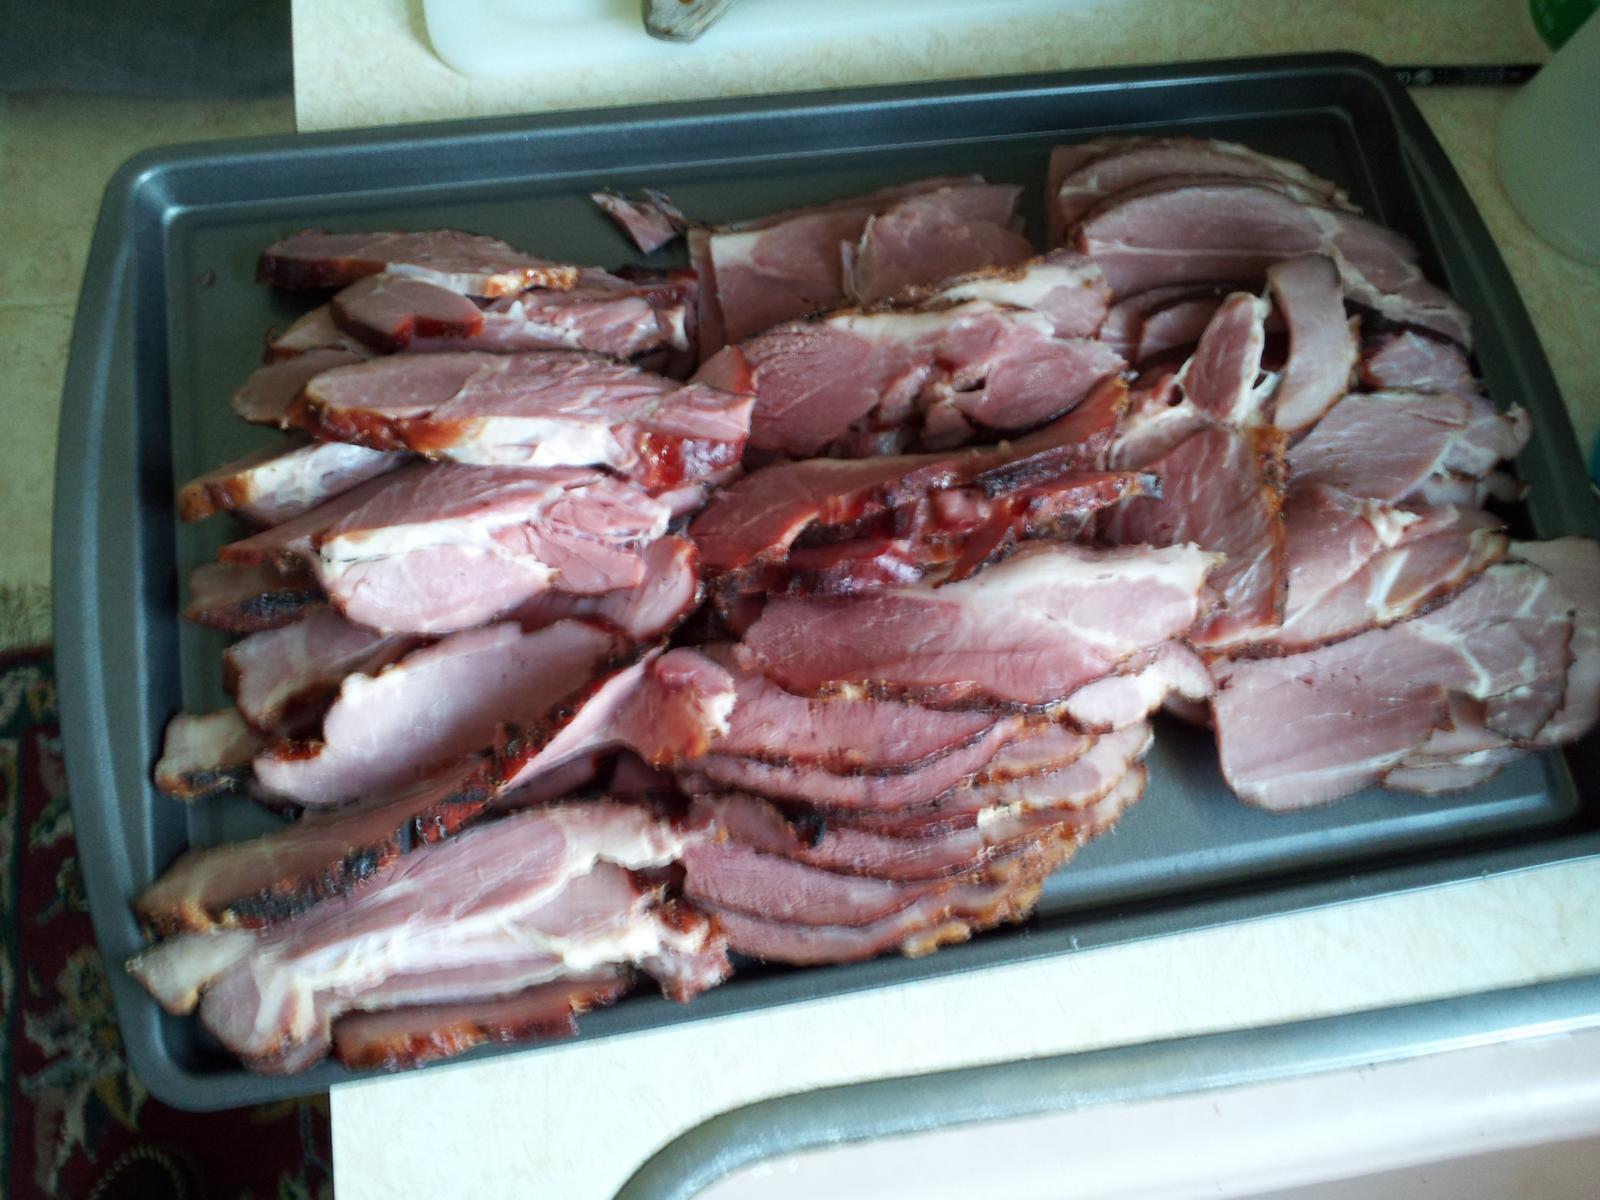
Step 7 is final processing. Many people recommend resting the meat in the refrigerator overnight to allow the smoke flavor to blend into the meat. I did not. I let the meat cool down to around 50 degrees and grabbed one slab at a time to slice and pack.
Hand slicing 20+ pounds of bacon is time consuming and difficult to keep consistent. You also end up with a lot of oddball bits of meat that I just carved into smaller chunks for adding to other recipes.
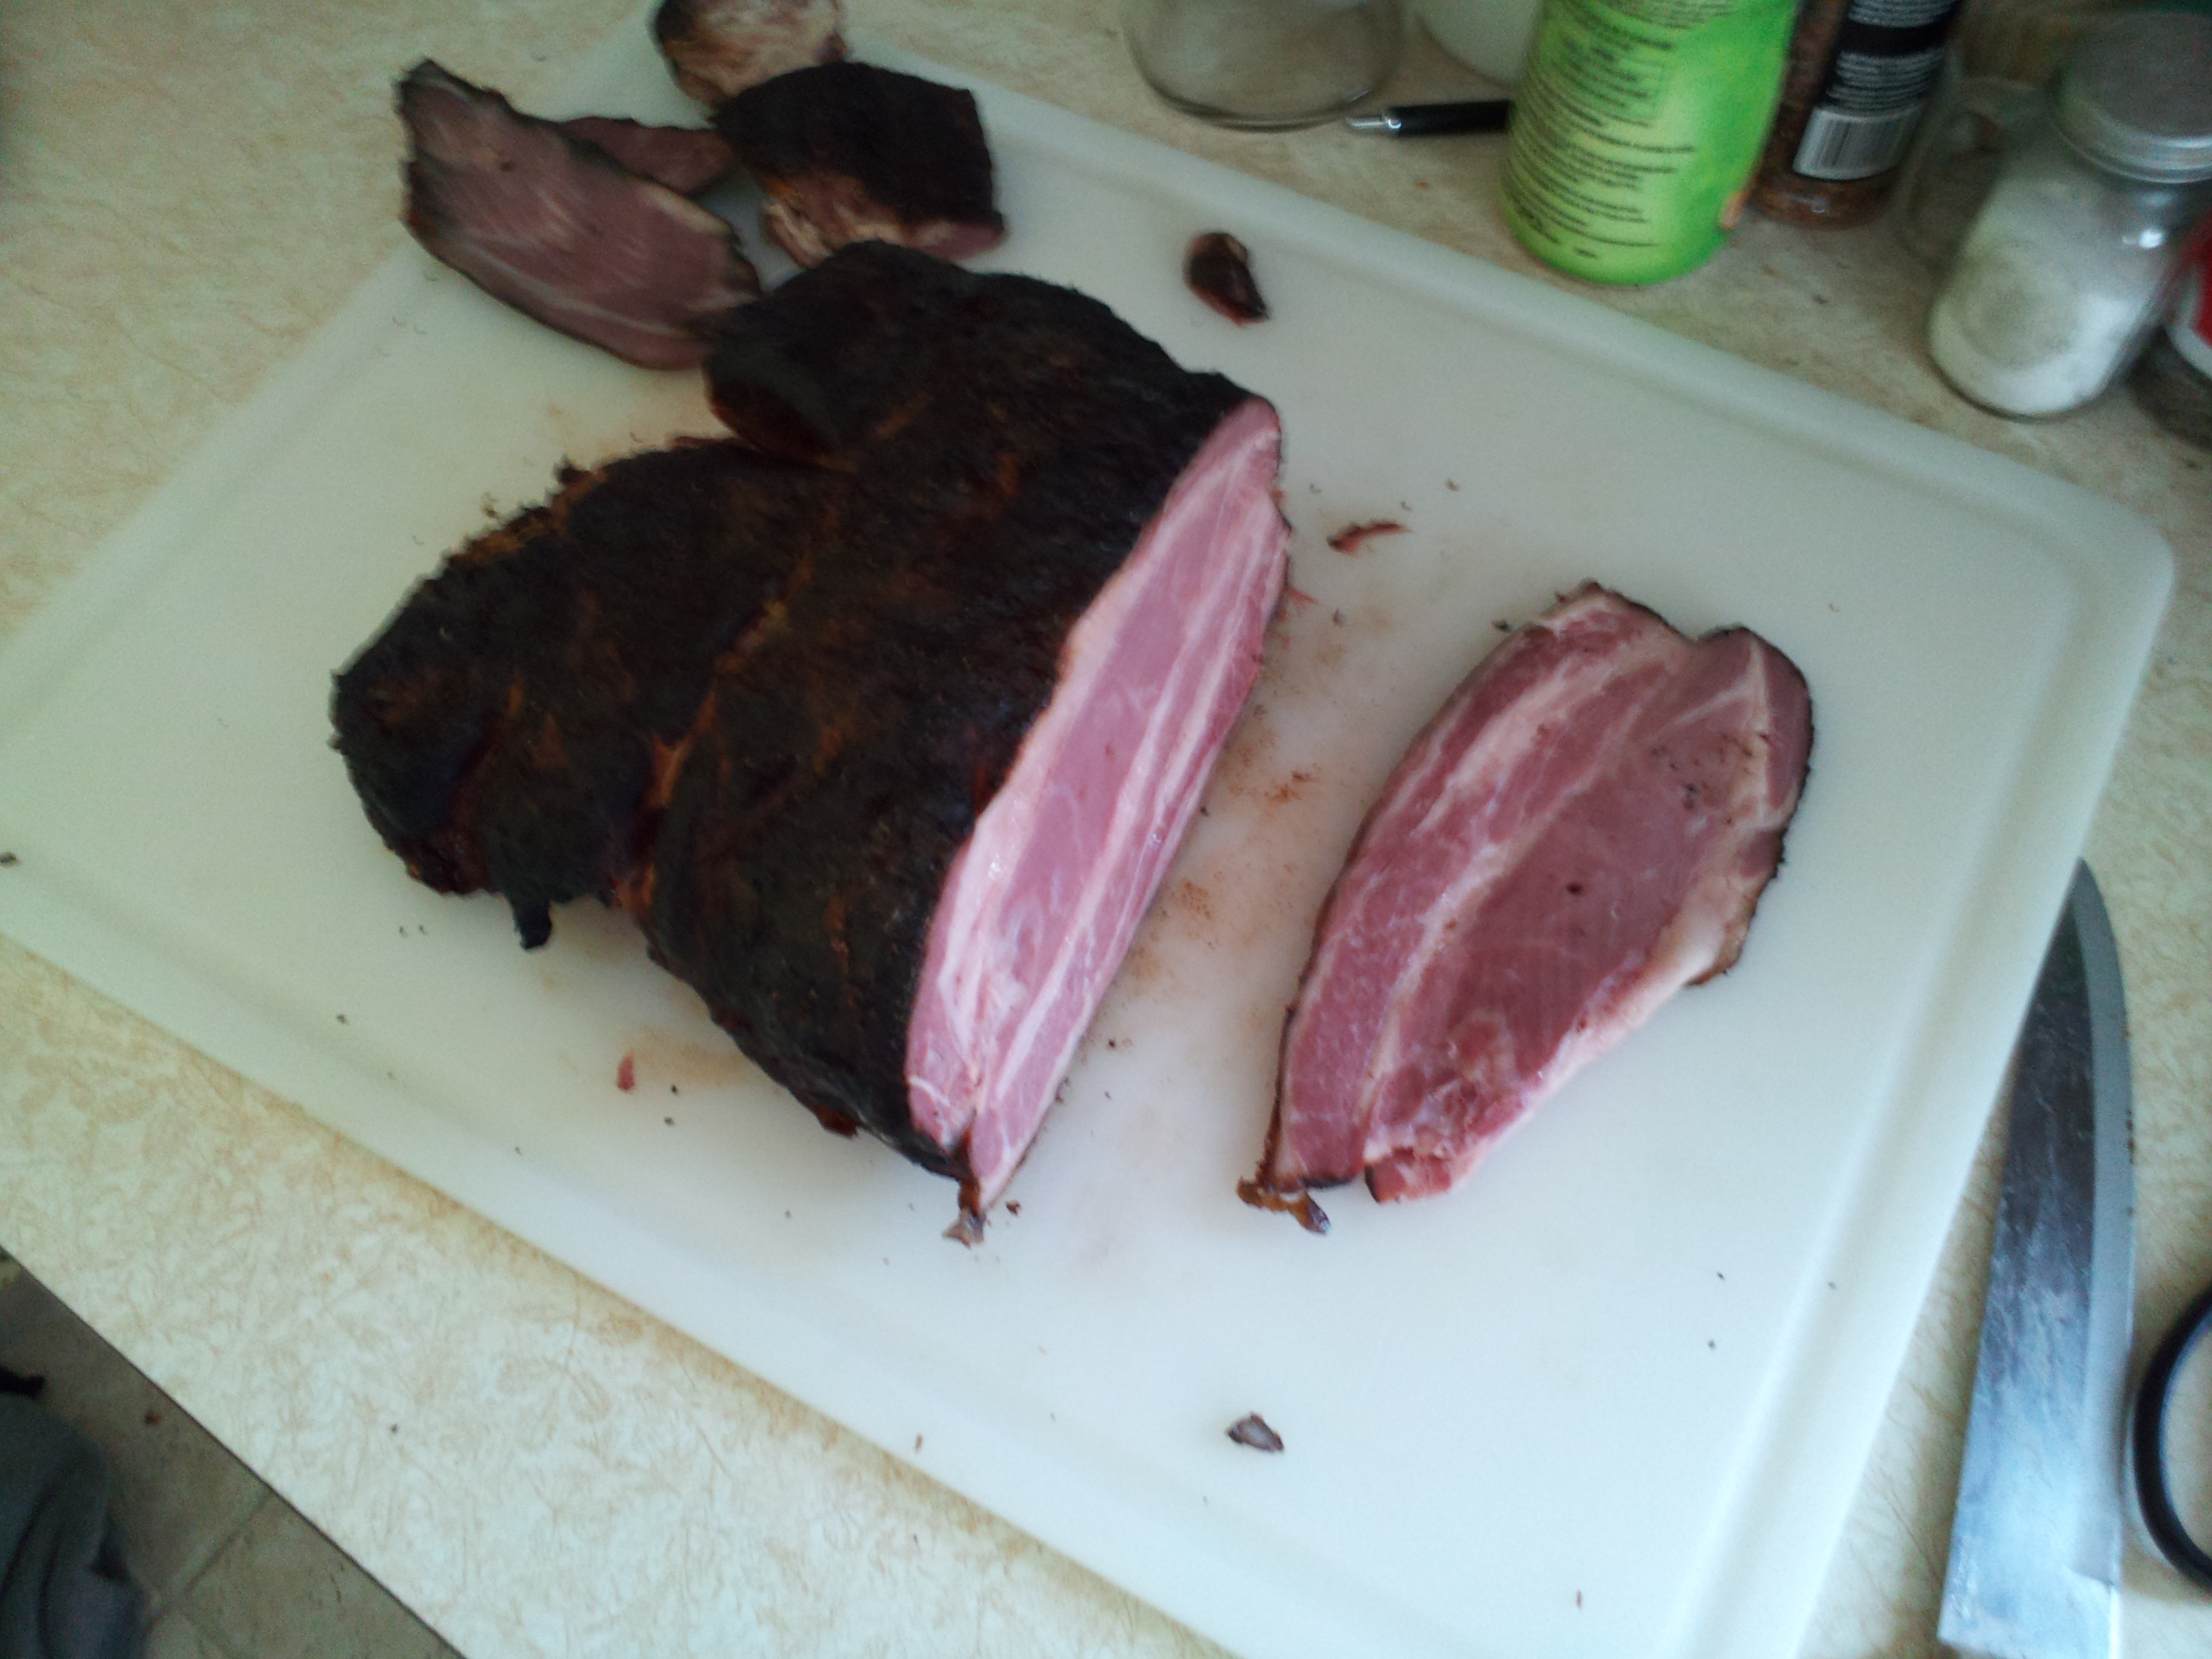
After carving slabs into slices, I vacuum sealed about about half pound portions and put them in the freezer. For hand slicing, I should have allowed the meat to partially freeze but I was running low on time and high on bacon smell.
Final Thoughts
I should have trimmed all the initial meat into more uniform slabs. Some the larger chunks would have been better with longer curing times. Plus uniform slabs would make the smoking process simpler.
The rise to temperature was far faster than I initially estimated. I’d really like to build a cold smoker box to waft smoke over a couple of days at low temperatures to allow the smoke to penetrate deeper into the meat. Hot smoking smells delicious but I think the overall flavor would be better with longer and slower processing.
The end product is absolutely delicious. I cooked up final samples (breakfast for dinner rocks) for myself and my neighbor, Ken. Ken handed me a $50 and took home a third of the meat. The donation covered all of the meat costs, which is awesome.
Success achieved with more to learn.
Tags: buckboard bacon, curing2 Comments
| M | T | W | T | F | S | S |
|---|---|---|---|---|---|---|
| 1 | 2 | 3 | 4 | 5 | ||
| 6 | 7 | 8 | 9 | 10 | 11 | 12 |
| 13 | 14 | 15 | 16 | 17 | 18 | 19 |
| 20 | 21 | 22 | 23 | 24 | 25 | 26 |
| 27 | 28 | 29 | 30 | 31 | ||
Popular Resources
Categories
- Brewing (11)
- Code (111)
- Convergence (26)
- Game Design (4)
- Hovel (1)
- Labyrinth Lord (71)
- Maintenance (9)
- Merakai (15)
- Musings (199)
- Old School (100)
- Random Generator (17)
- RPG (404)
I get almost all of my bacon and sausage from a local smokehouse. With the equipment they have, obviously they’re very good about consistent slicing. Usually they only take the consistently-sliced cuts to the market, but if I go to the smokehouse itself I can sometimes find the ends. I find I like having some irregularly cut bacon because I can get different textures (some crisp, some chewy) when I cook it.
I’ve also gotten whole slabs (cured and smoked bellies) from them, which I find work really well for things like pea soup and chowders — cube ’em up and go from there, instead of working from sliced bacon.
Irregularly-shaped bacon is not a bad thing. A little harder to cook to a consistent finish, but sometimes I don’t want a consistent finish 🙂
Awesome that you have a local smokehouse. I wasn’t stressed about the inconsistencies just commentary on the process. I’ll make good use of the oddball bits and the rest just requires a bit more attention while cooking, which is pretty quick.